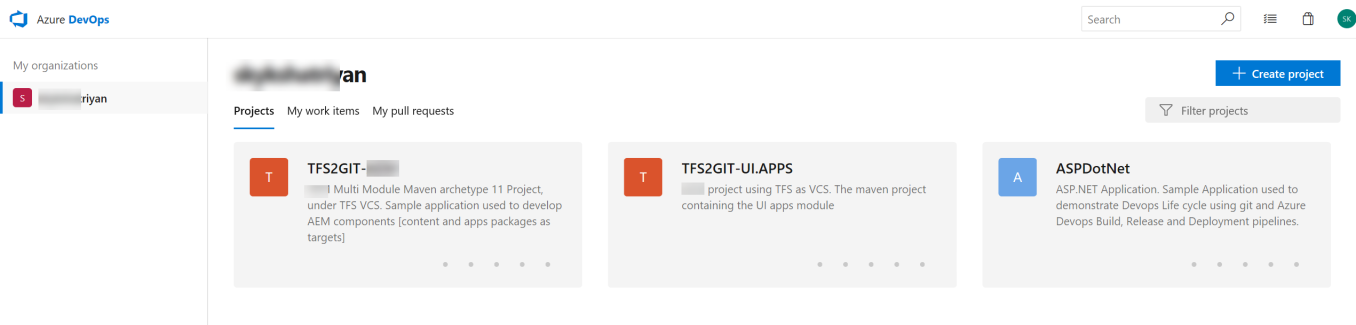
Azure Devops – ASPDotNet

SYNOPSIS:
Following is the guide to host a ASP.NET web application on Azure Devops [ Formerly VSTS ]. The guide will demonstrate the Devops Build, Release and Deployment pipeline using the Azure Devops platform.
TOOLS USED:
- Azure Devops
- Git
- Sublime Text 3
- Cmder
- Powershell
- Windows 10 Enterprise
STEP-01: Local Machine Setup

STEP-02: Once the project is pushed to VSTS git
STEP-03: Project description and Overview,

- Select the overview from the left sidebar
- Describes the project
- The language the project is using
- the status of the build pipeline
- the stats of the project, describing how many commits have been made, pull request and success rate of the pipeline and the deployments
- Members involved in the project
STEP-03: Repository Information

- Select the Repo from left sidebar
- select the project from the first right pane, shows the folder and file structure
- The right pane gives the last modified date for each folder/file and its corresponding short SHA-1 key from git commits
STEP-04: VSTS Agent Setup

Here, we shall configure a self Hosted VM for build process. To do so we need to configure a Agent.
- Go to organization settings
- Select the Agent Pool configuration
- Download the Agent and follow the instructions to host a agent on the VM
- Once successfully configured, Agent appears on the Agent Pool, select the agent
- The build triggered using the agent and the agent capabilities can be seen and modified
STEP-05: Build Pipeline Setup

- Select Pipelines from left pane
- Click on the Build pipeline
- Select the Tasks Tab
- Click on the Pipeline, to modify the settings
- Name the Build Pipeline
- Select the Agent from the Pool which was created in STEP-04: 03
- Parameters for the pipeline – select the solution file from project
- Name the Artifacts directory where the final artifacts will be stored
STEP-06: Build Pipeline – Source Information

- Select the pipeline option from left pane
- Choose build pipeline
- From the tasks, select the Get Sources
- Select the Azure Repo Git option since our project is under Git VCS
- Select the project from drop-down
- select the respective repository
- select the default branch for the build pipeline
- Before every build is triggered, make sure the build directory is clean
STEP-07: Build Pipeline – Agent Details
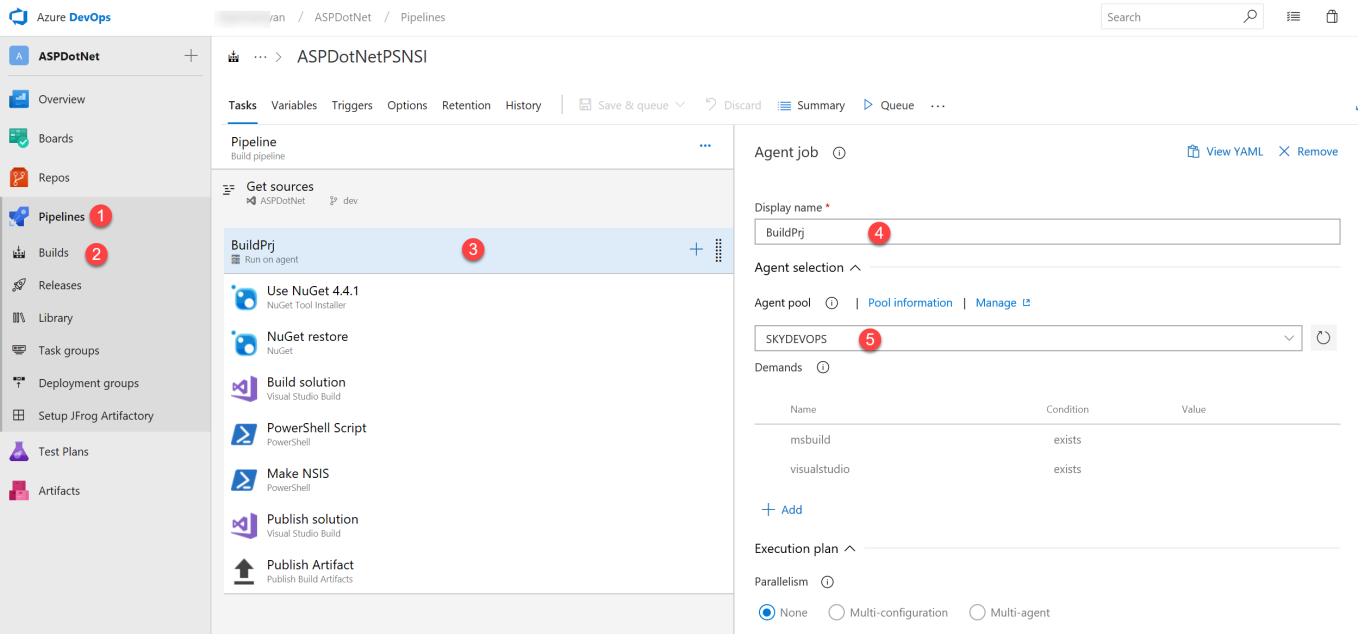
- Select the Pipeline option from left sidebar
- Click on the Build pipeline
- From the Tasks Pane select the Run on Agent
- Enter name for the build agent
- Select the build agent form the pool which was created earlier in STEP-04: 03
STEP-08: Build Pipeline – NuGet Task
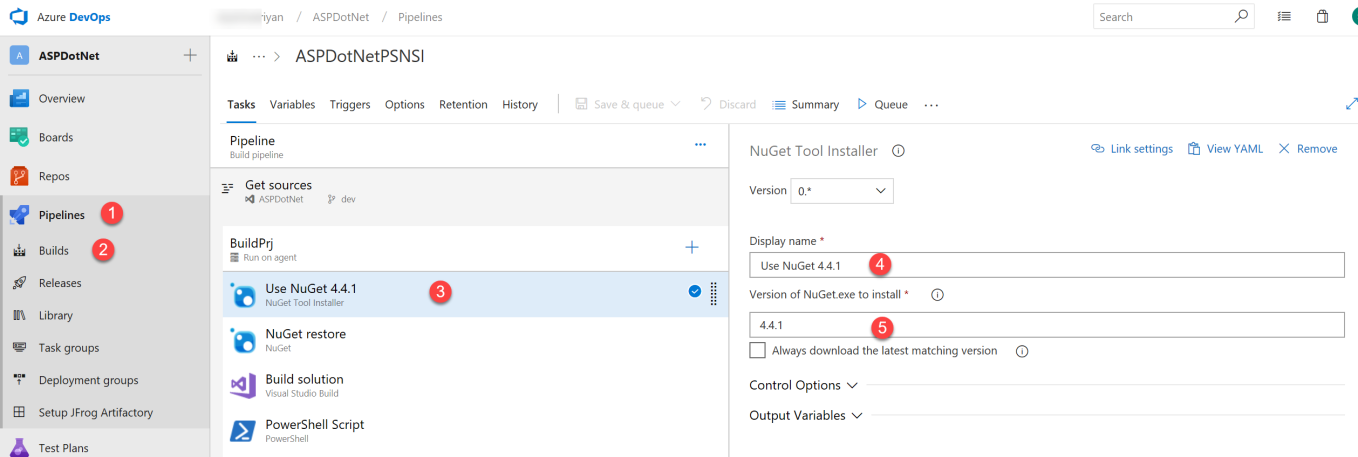
- Select the Pipeline option from left sidebar
- Click on the Build pipeline
- From the Tasks Pane select the Use NuGet task
- Name the task
- select the version of NuGet to use
STEP-09: Build Pipeline – Restore NuGet Packages Task

- Select the Pipeline option from left sidebar
- Click on the Build pipeline
- From the Tasks Pane select the NuGet Restore to restore the dependencies
- Enter the name for the Task
- Nuget restore commands
- Verify that the right solution file is selected
- Select the option to use the packages form Nuget.org repository
STEP-10: Build Pipeline – Build Solution

- Select the Pipeline option from left sidebar
- Click on the Build pipeline
- From the Tasks Pane select the Build Solution task
- Name the task
- select the version of Visual Studio to use for the build
- Pass the command line arguments for the build
- use the default settings for the platform
- use the default configuration for this build.
STEP-11: Build Pipeline – Make Executable using makensis

- Select the Pipeline option from left sidebar
- Click on the Build pipeline
- From the Tasks Pane select the Powershell script task
- Name the task
- Select the inline powershell option and write inline PS1 to get the tag version from the git tags and extract the tag and pass it to the makensis to use it as the PRODUCT VERSION during the exe build
- Error action preference is set to silentlycontinue to ignore any errors and silently continue
STEP-12: Build Pipeline – Publish Solution

- Select the Pipeline option from left sidebar
- Click on the Build pipeline
- From the Tasks Pane select the Build Solution task and modify it to publish solution
- Name the task
- verify the correct solution is selected
- select the appropriate visual studio version
- Pass the commandline options to publish arguments and include the default publish profile pubxml file
- select the default build platform
- select the default build configuration which came with the task
- make sure to clean the publish directory before publishing
STEP-13: Build Pipeline – Publish Artifacts

- Select the Pipeline option from left sidebar
- Click on the Build pipeline
- From the Tasks Pane select the to publish the build artifacts
- name the task
- select the source directory where the build artifacts are stored
- verify the artifacts drop directory which was created in STEP-05: 05
- select the azure pipeline artifacts to publish
STEP-14: Build Pipeline – Build Variables

- Select the Pipeline option from left sidebar
- Click on the Build pipeline
- Select the variables Tab
- select the pipeline variables
- you can pass the dynamic build variables in the key:value pair format
STEP-15: Build Pipeline – Build Triggers

- Select the Pipeline option from left sidebar
- Click on the Build pipeline
- Select the Triggers Tab
- Select the Project from the Triggers tab
- Enable Continuous Integration for the project
- Trigger refs/tags/v* will trigger a build if a tag is pushed
- Trigger dev will trigger a build if the code is pushed to dev branch
- Trigger master will trigger a build if the code is pushed to master branch
STEP-16: Build Pipeline – Build History
This will display all the build which were triggered manually and using the CI pipeline

- Select the Pipeline option from left sidebar
- Click on the Build pipeline
- Select the project
- Select the History to see the entire build history
STEP-17: release Pipeline – SetUp
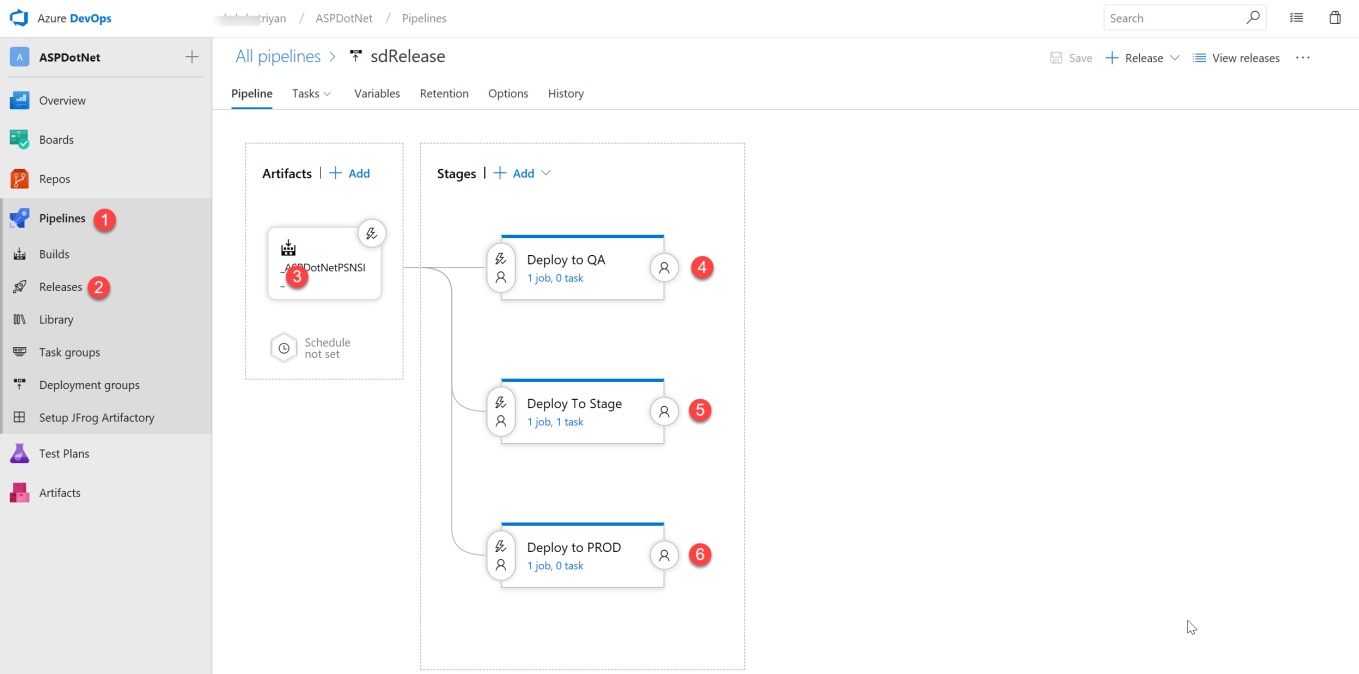
- Select the Pipeline option from left sidebar
- Click on the Release pipeline
- Select the Edit pipeline and select the Artifacts option
- create a empty stage to deploy to QA
- create a empty stage to deploy to Stage
- create a empty stage to deploy to PROD
STEP-18: Release Pipeline – Artifacts Options

- select the Build option
- Select the Project to setup the release pipline
- source for the release will be the build pipeline project
- Default version will be set to a specific branch and git tags
- Default branch to trigger the release will be dev
- tag reference for release using tags will be refs/tags/v*
- Set appropriate alias to identify the release
- click Add to set the above options
STEP-19: Release Pipeline – Artifacts Triggers

- Select the Pipeline from the Left sidebar
- select the release pipeline
- Select the trigger option from the Artifacts block
- Enable the continuous deployment option
- Enter the reference tags refs/tags/v* to trigger the deployment after successful build
- enter the git branch for which to trigger the deployment
- Enable Pull Request trigger so that if a pull request is made and code is merged, we can build and release the artifact automatically
- master branch is used for pull request trigger, when code is merged on to master branch then build and release is triggered
- stages where the pull request trigger is confirmed is stated here
STEP-20: Release Pipeline – Deploy to QA

- Select the Pipeline from the Left sidebar
- select the release pipeline
- Select the Deploy to QA stage trigger
- select the after release trigger to trigger deployment after release
- select dev branch trigger so only code pushed to dev will be deployed to QA servers
STEP-21: Release Pipeline – Deploy to Stage

- Select the Pipeline from the Left sidebar
- select the release pipeline
- Select the Deploy to Stage servers trigger
- select the after release trigger to trigger deployment after release
- select the refs/tags/v* to deploy the artifacts when the tag is pushed
- make sure to save
STEP-22: Release Pipeline – Deploy to Stage – Tasks

- Select the Deploy to Stage task for the Release pipeline
- select the tasks tab
- add a copy files task to copy the artifacts to a particular location on the server
- name the task
- select the source, which will be the SdArtifacts directory created in STEP-05:05
- parse the source folder to select only exe files
- select the target folder on the staging server
STEP-23: Release Pipeline – Deploy to PROD

- Select the Pipeline from the Left sidebar
- select the release pipeline
- Select the Deploy to PROD servers trigger
- select the after release trigger to trigger deployment after release
- Enable filters
- select the master branch
- enable the pull request trigger to trigger the deployment using a pull request
STEP-24: Release Pipeline – Finished Pipeline

- Select the Pipeline from the Left sidebar
- select the release pipeline
- select a release pipeline
- shows the continuous deployment for the release pipeline
- Based on the trigger conditions deployments were triggered and deployed to stage
- Deploy to stage tasks were executed and artifacts were copied to target directory
- Based on the trigger conditions deployments were triggered and deployed to PROD

I genuinely prize your piece of work, Great post.
LikeLiked by 1 person